Going Vertical
Our original plan with this kitchen was to forego wall cabinets all together. If you have looked around at modern designs for kitchens lately, many of them have few or no wall cabinets. Some have open shelving instead, but a clean, open look is a popular look for kitchens nowadays. We liked the idea of opening up the feel of our kitchen a bit since there is only one little window and it s a north facing window. The kitchen is the smallest and darkest room of the house (not counting the bathrooms), which makes me sad because I spend so much time there.
However, this plan did not work out for us because of one primary reason: the hood/mode of ventilation. We did not know ahead of time whether we would be able to install a vent over the stove that would exhaust to the outside world. Our dream was that we could, but once we removed everything, we found that it was not be possible without relocating the stove entirely. This would involve relocating something else and then running the gas line to a different place. All this would add up and since we were trying to sort of stick to a budget, we ruled it out.
This is what kitchen renovation is about: making decisions and compromising on what you would love to have with what you can live with. We’ve lived with a recirculating vent for years and, though we don’t love it, we are used to its problems, so it was not a tough choice.
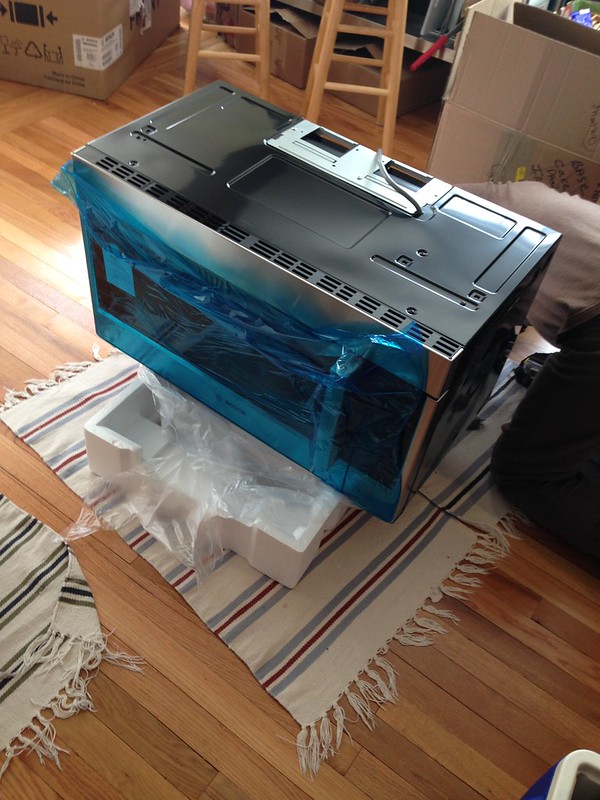
Decisions made also impact other decisions that have to be made and so it was the case with this one as well. Because we chose to go back to a recirculating vent, we also chose to go with a microwave hood. This would help us gain back some counter space but also meant that we would have to install a cabinet above the microwave hood.
So, you see where this is going, right? Once we realized we would have to install one cabinet for the microwave hood appliance, we knew we would have to fill at least that one wall with cabinets because it would just look odd to have one cabinet with a microhood under it floating on a wall.
We decided to keep it to one wall, though, and Not turn the corner as many others would because I really wanted to keep the space next to the window free to let in as much light as possible. I can tell you that it must seem strange to everyone because everyone who has come into the house has assumed we would turn the corner.

We did spend quite a bit of time trying to figure out what to do with the corner so that it would not just be wasted space. As you can see there is a gap under the soffit and next to the wall cabinets that was open and blank.

Fortunately, Ikea makes a nine inch wine bottle cabinet that matched the color of our cabinets and fit perfectly in that gap. However, it is a bit long and hangs down past the bottom of our other cabinets. We thought about cutting it down, but it is a made of a different material than the main cabinets and we were unsure whether it would be as easy to put back together. Since we did not want a Humpty-Dumpty situation on our hands which would require yet another trip to the giant blue and yellow building, we decided to keep it as is, except we installed it upside down. On purpose! Really! We don’t drink much wine and it would be too high to store wine bottles anyway, so my plan is to put cutting boards and smaller baking pans up there.

The microhood itself was quite a pain to install, but unlike many things in this kitchen, this was mostly our doing. To achieve that space that I wanted between the counter and the wall cabinets, we had to stack two cabinet sizes from Ikea. This meant that our hood, if we installed it the standard way, would be either too high or too close to the stove. Well, I can tell you that too close is really a pain. The one that we removed was only 16 inches above the stove and I was always running into it with the handles of my ladles or hitting it with my pots and pans. If we had to go one way or the other, I would prefer higher.
However, the husband did not like the idea of the microhood living above the level of the cabinets next to it. I can see his point. Those cabinets would tend to get dirtier and be hard to clean. The only other choice was to design some way to install the microhood at a level that would bring it down even with the wall cabinets.
Thankfully, between the two of us, we still had a few working brain cells and we devised something.
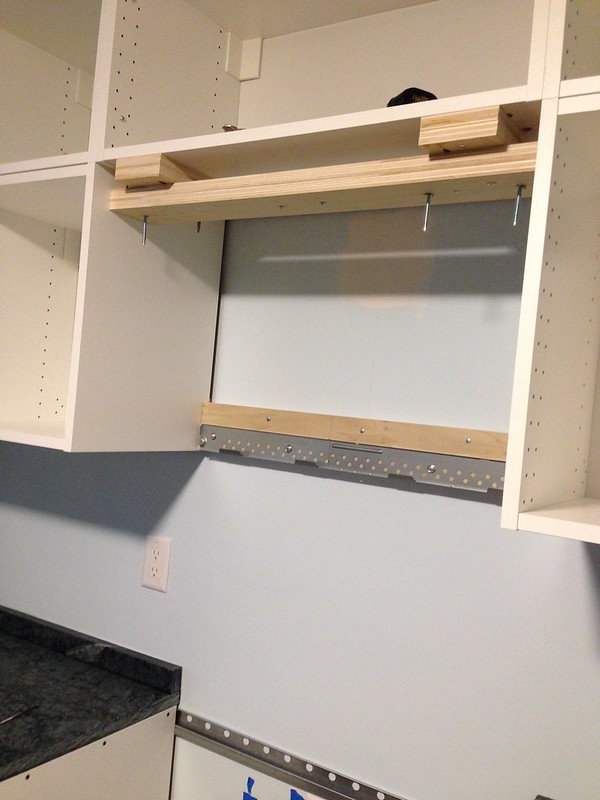
It took us a few days to figure it out and we needed three people working together to do it, but it was worth the effort.
Also, on a side note, if you are considering Ikea cabinets with a microhood, be aware that their cabinets are deeper than the standard 12 inches. They are more like 15.5. In order to open the microwave door, it will have to be installed to clear the cabinets, which meant for us that we also had to move it out an inch and a half. This was easily done by attaching two thicknesses of plywood to the back wall.
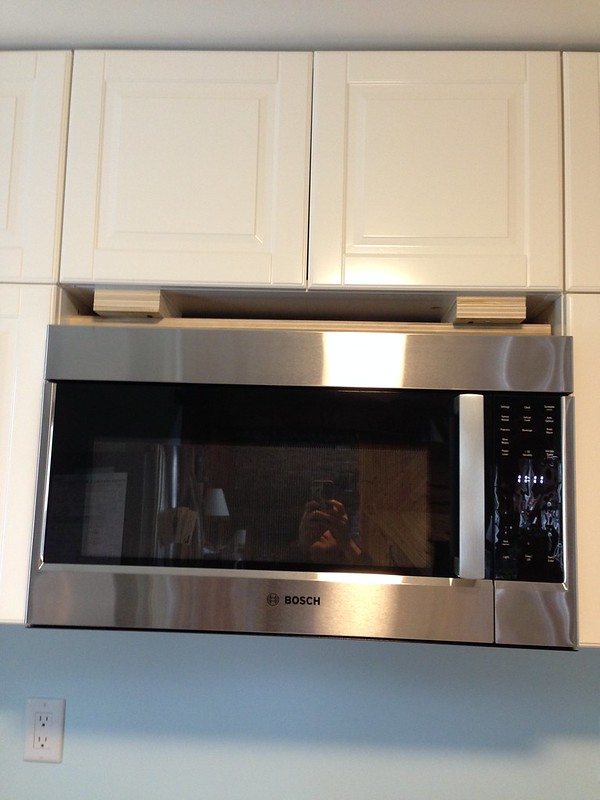
And now we have half of the appliances in the kitchen hooked up! Don’t worry about those unsightly blocks of wood. We have some decorative trim pieces to hide them. More to come soon.
Posted on May 3, 2016, in Inspiration and tagged ikea cabinets, kitchen renovation, microhood. Bookmark the permalink. Leave a comment.

Leave a comment
Comments 0